Splicing and Composing Photo Elements to Create Artwork
Use simple Photoshop tools and a combination of images to create vivid photoreal images. This style of image is very effective within the advertising and branding designs. This tutorial will show you how to compose an image using human and animal photographs.
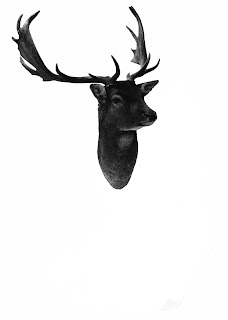
1. Once you have your chosen image in black and white on a plain white background, apply a levels adjustment layer and use the sliders to create to darken the model, once you are satisfied with the colour merge the layers into a single layer by selecting layers > merge layers. Repeat this step for your wildlife image.

2. Drag your wildlife image onto the same document as your original model image. Add a new layer and paint out the human head, then overlap the animal head layer and change the opacity to 50% so you can see the human body underneath. Use the free transform tool by selecting edit > free transform this will allow you to alter the scale and rotate the animal head to fit with the body. Now apply a layer mask and use the brush tool to make the transition between the head and body smooth.
3. Select the body layer and use the rectangular marquee tool to isolate the neck area. Then select filter > liquify, check the "activate show backdrop" and set the opacity to 50%. Now using the apply forward warp tool with a big brush size, pull the neck area to fit around the animal head.
4. Now you have done the main bulk of the image it is time to add the little details. Here I have added a butterfly that has been altered to match the same colour and contrast as in step one. Drag your new image onto your original one and use the free transform tool to make the new image proportional to your original one.
5. The final step is to create a good composition and add any last effects or features. You can use a series of pictures and text to add to the image. I have used this awesome brush set urban scrawl (which can be downloaded for free at http://invisiblesnow.deviantart.com/art/Urban-Scrawl-2-83053171) to create a background city scene, I added the brushes on individual layers and resized them to give the right depth of field. I also added the photocopy filter at a very low opacity to the model to make it fit better with the illustrative background.
Use simple Photoshop tools and a combination of images to create vivid photoreal images. This style of image is very effective within the advertising and branding designs. This tutorial will show you how to compose an image using human and animal photographs.
1. Once you have your chosen image in black and white on a plain white background, apply a levels adjustment layer and use the sliders to create to darken the model, once you are satisfied with the colour merge the layers into a single layer by selecting layers > merge layers. Repeat this step for your wildlife image.

2. Drag your wildlife image onto the same document as your original model image. Add a new layer and paint out the human head, then overlap the animal head layer and change the opacity to 50% so you can see the human body underneath. Use the free transform tool by selecting edit > free transform this will allow you to alter the scale and rotate the animal head to fit with the body. Now apply a layer mask and use the brush tool to make the transition between the head and body smooth.
3. Select the body layer and use the rectangular marquee tool to isolate the neck area. Then select filter > liquify, check the "activate show backdrop" and set the opacity to 50%. Now using the apply forward warp tool with a big brush size, pull the neck area to fit around the animal head.
4. Now you have done the main bulk of the image it is time to add the little details. Here I have added a butterfly that has been altered to match the same colour and contrast as in step one. Drag your new image onto your original one and use the free transform tool to make the new image proportional to your original one.
5. The final step is to create a good composition and add any last effects or features. You can use a series of pictures and text to add to the image. I have used this awesome brush set urban scrawl (which can be downloaded for free at http://invisiblesnow.deviantart.com/art/Urban-Scrawl-2-83053171) to create a background city scene, I added the brushes on individual layers and resized them to give the right depth of field. I also added the photocopy filter at a very low opacity to the model to make it fit better with the illustrative background.


No comments:
Post a Comment